Showing posts with label Home Baking. Show all posts

Thursday, January 2, 2014

Messed Up the Icing on your Cake? No Problemo!

How many times have you messed an icing on a cake? Well, I have, quite a few times. And since it is a cake it should look good, you should have to be able to remedy that.

Here is one way:

It is always good to crumb coat cake. The first coat helps to hide the cake especially of you are using a bright or dark colored cake like red velvet and a lighter colored icing.


I am trying to go for layers of icing - something simple. 


It went well for a couple of layers but it soon became crooked on some parts. 

What you can do is take a popsicle stick or a small spatula and make short spiral strokes across the layers of icing. This is cream cheese frosting, by the way. 


I used short up and down strokes to achieve this kind of pattern. 


Continue and do the same in the upper half of your cake. 

I used a toothpick to create swirls on top. 


And there you have it. Simple and easy trick to save your cake! :)


Thursday, December 26, 2013

My Christmas Cake

It has been a while since I last posted something here. It was Christmas and I got tied up with cramming over completing all the presents I need to buy.

I guess it is too late for Christmas Gift ideas now. haha! But one thing that will still be applicable is to start early next year. Will surely do that! :)

Aside from that, I was also busy with perfecting some cakes for the holidays.

Here is my Christmas version of the Chocoholic's Cake.


I added around 10 to 15 drops of mint to the ganache recipe. It is really up to you how much mint you would want. If you want just a hint, I say start with 5 drops and add a few drops at a time to adjust the potency. I use this peppermint emulsion in my ganache.


To make the green drizzling on top, you just mix 1 part cream 3 parts white chocolate and melt over a double boiler. Add a drop of green food coloring. Be careful not to add a lot the first time. It would be easier to darken a lightly colored ganache rather than lighten a darker one. I used a toothpick to get a few of the food coloring to avoid the danger of having the whole thing pour over your melted chocolate. Then, add a few drops of mint.  I used a piping bag to create the drizzle.

And there you are, a sweet treat for a the chocomint lovers! :) 


Monday, November 11, 2013

Chocoholic's Cake

I dread to bake such cake that seems to be so difficult to make. I haven't tried this before and knowing how fragile a moist cake can be, I hate to have to cut it in half to put frosting in between. 

When I finally had the courage, I found it most interesting that it is not as hard as I thought! Here is how I bake my very first moist chocolate cake.

I call it the "Chocoholic's Cake" because it is a moist sponge chocolate cake, filled with choco hazelnut spread, and covered with ganache. How sinful and delicious could this be?


Ingredients:

I got the recipe from Foodess.com so kudos to a great recipe! I found a few things that I did not expect in the ingredients such as water and instant coffee. 

1¾ cups all purpose flour
2 cups granulated white sugar
¾ cup unsweetened cocoa powder
1½ tsp baking soda
¾ teaspoon salt
2 large eggs
1 cup buttermilk 
½ cup butter, melted
1 tbsp vanilla extract
1 cup hot coffee (or 2 tsp instant coffee in 1 cup boiling water)


Procedure:

Preheat your oven at 350 degrees F and prepare your pan by greasing and putting parchment at the bottom.

The first thing to do is to combine all your dry ingredients, that is, sugar, flour, cocoa powder, baking soda, and salt. Stir well so that the ingredients are incorporated.

Add the eggs, milk, vanilla, melted butter, and hot coffee a little at a time. This will make your batter very very runny. So don't panic if it seems to be the consistency of hot chocolate drink. 


If you have two round pans, it would be best to divide the batter among them so you need not to cut the cake afterwards. But I only have one pan so it'll have to make do. I put it all in and bake at for about 30 minutes

Once cooked, it will look like this - nice and springy. Unlike most cakes, you will not be able to tell if it is cooked by inserting a toothpick and see if it comes out clean. You are making a moist cake, it will never come out clean. You will know it is cooked if you can smell it and the top has risen nicely. Let cool for a few minutes before removing from the pan.


If  I will be gifting it, I will put it on a cake board. But since this is for my parents and siblings enjoyment, I just placed it on a nice plate.


Once it cooled completely, I cut it in half horizontally and added the choco hazelnut spread in between. I used a local brand but you can use Nutella if you like.

Surprisingly, it is not as difficult as I thought to cut the cake. It is perfectly moist, but there it still has the consistency of a cake. I cut it while still a little bit warm in the center.

Pls. excuse my foot, right there. (blush)


I made the ganache with the following ingredients:
500g dark chocolate
250g unsalted butter
180g heavy cream

Just pour it on top and spread. It is going to be messy so you better have your apron on. Spread on the sides of the cake as needed. Try to make is as smooth as you can.


Chill so the ganache may set.


And serve. :)


I hope you liked this post! :)


Tuesday, October 29, 2013

Cream Puffs Recipe

One of the favorite recipes I like to bake. It's definitely a crowd pleaser. :)


Pastry Shell (Pate a Choux) Ingredients:
200g Water
70g Butter
2g Salt
2g Sugar
140g Bread Flour, sifted
200g Eggs (est. 3 eggs + 1 yolk)

Pastry Cream:
450g Milk
50g Butter
40g Cornstarch
125g Sugar
4 Eggyolks

Ganache:
25g Heavy Cream
75g Dark or Bittersweet Chocolate. chopped

Procedure:

  1. Preheat oven to 400 degrees F. Grease baking sheet or pan.
To make the Pastry Shell:
  1. combine water, butter, salt, and sugar in a pot and heat on top of the stove until all butter is dissolved and bring to a gentle simmer.
  2. Lower the heat and dump all the flour. Stir until there is no dry flour. Stir until it gathers into a ball and does not stick to the sides. (*see notes)
  3. Transfer the cooked flour to a mixing bowl and stir until cooled.
  4. Add eggs one at a time. (*see notes)
  5. Put the batter into a piping bag and pipe to pans.
  6. Bake in the oven for 15-25 minutes.
 To Make the Pastry Cream:
  1. In a heavy bottom pot, Combine milk, butter, and half of the sugar. Heat on top of the stove until simmering lightly. (*see notes)
  2. While waiting to simmer, whisk together the rest of the sugar, eggyolks, and cornstarch until light.
  3. When the milk mixture simmers, scoop a few cups of the milk mixture to the egg mixture and continue to stir. This will temper the egg mixture to prevent it from forming into paste when added to the milk mixture.
  4. Pour the tempered egg mixture to the pot while stirring continuously.
  5. Stir until you reach the nappe consistency. (*see notes)
  6. Let cool. Stir from time to time to avoid forming the skin. (*see notes)

 To Make the Ganache:
  1. In a double boiler, heat the heavy cream.
  2. Add chocolate and let it melt in the cream. Stir constantly. It will help if the chocolate is chopped evenly so they melt all at the same time.

Assembly:
  1. Poke holes underneath the pastry shells 
  2. Fill pastry bag with pastry cream.
  3. Pipe into the pastry shells.
  4. Dip tops of the cream puff into ganache.
  5. Sprinkle your favorite toppings.
Notes:
Pastry Shells
  • When cooking the flour in the water mixture, you can remove the pot from the heat so you can work on mixing it more evenly without the liquid drying quickly. Then bring the pot back to the heat to continue cooking.
  • When adding eggs. make sure to mix until you can no longer see the egg before adding another one. Resulting mixture should be sticky and creamy in consistency.
Pastry Cream
  • Do not boil the milk mixture. Just let it simmer a little bit and add the egg mixture.
  • Nappe consistency is when you dip a spoon into the cream and you run your finger horizontally, what was left on the top does not run down the spoon.
  • The skin forms when left exposed and not stirred. When it is cool enough, you can cover with plastic wrap. Make sure the plastic wrap touches the cream.
Have fun baking! :)

Saturday, October 26, 2013

Ready For Red Velvet (Red Velvet Cake Recipe)


I have been searching for a good red velvet cake recipe. Most that I can find online are pretty much the same in terms of ingredients and measure so I guess there's a standard recipe for this kind of cake.

It's time to make some cake! Click here for the printable recipe. 
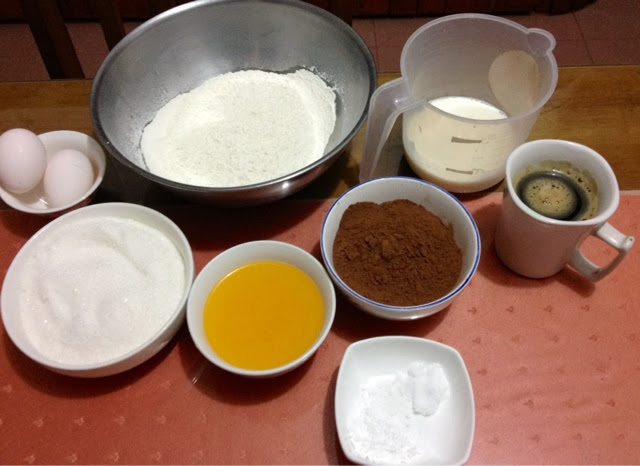
What you need:


For the Cake:
1/2 cup Unsalted Butter
1 1/2 cup White Sugar
2 Large Eggs
2 1/2 cups Cake Flour
2 Tbsp Cocoa Powder
1/2 tsp salt
1cup Buttermilk
1 tsp Vanilla Extract
2 Tbsp Red Food Coloring
1 tsp Vinegar
1 tsp Baking Soda


For the Cream Cheese Frosting:
1/2 cup Unsalted Butter
2 tsp Vanilla Extract
9oz Cream Cheese
2 1/2 cups Powdered Sugar

Notes:
It can be difficult to find buttermilk in liquid form if you are in the Philippines. Groceries usually only carries regular milk brands. Not to worry because you can add a tablespoon of lemon juice or white vinegar to regular milk to substitute real buttermilk. Buttermilk is tangy and adding lemon juice or vinegar will make up for the taste you are looking for with real buttermilk.

To Make the Cake:


Pre-heat oven at 350 degrees F. 

Combine flour, cocoa powder, and salt in a bowl. Use a whisk or spoon to mix. Set aside. Mixture should look like this.

In a mixer or separate bowl, cream together butter and sugar. Mix the butter until fluffy then add sugar and mix again. The resulting mixture should be grainy.


Add eggs. One at a time.


Add the vanilla.

Add the food coloring.


Alternately add your flour mixture and buttermilk. Beginning and ending with the flour mixture. I would normally add 1/3 of the flour then 1/2 of the milk first.


With this next step, you have to move quite quickly. Make sure you have your pan ready, greased and lined with parchment at the bottom.


Combine the vinegar with the baking soda. Quickly mix and fold into the batter.


My batter looks like this. Not too thin and quite smooth and creamy.


You can pour it all in an 8-inch pan. Or if you have two pans you can divide the batter among the two pans. This way you do not need to cut the cake in half when assembling. I only have 1 pan so I poured all the batter in. 


Level the top with spatula and place in oven to bake for 30-35 mins.

While that is baking, you can start your Cream Cheese Frosting.

Cream together butter and cream cheese until smooth.


Add sugar 1/2 cup at a time. Then add the vanilla.


Use more powdered sugar if the frosting is still too soft. It it becomes too thick, thin with a teaspoon of milk. 

You are looking for this consistency.


Check on your cake. You will know it is done when you put your finger on top and it springs back. The sides should also pull away from the pan a little bit.


Assembly:
 Let the cake totally cool first. If it is warm, the buttercream will melt. 

Once cool, cut it in two equal parts horozontally. I am not going to gift this cake so I just let it sit on a pretty plate instead of a cake board.


I also flatten the part that rose while baking and turn it over so that the bottom is on top. This will make a more level top.

Add frosting in between the two slabs of cake.


By this time you would notice how crumbly this cake is. This is because of the leavening used to make it rise that is the vinegar and baking soda.

Prepare to crumb coat. Crumb coating is important for you to ensure that no crumbs will show when you frost the cake.


Here is the crumb coated cake. Notice that some red on the sides are still showing.


It is best to chill for a few minutes before frosting. 

Here is the frosted cake. No special technique needed. Just gently spread your frosting and try smooth it as much as you can. It would also help if you frost the sides first then the top.


I don't have a large star tip so I used this small one to decorate it a little bit.


I just squeeze and pull to make these small details.


And our cake is done. :)